B2HS: Build Your Own Timeline 101
September 9, 2022
Welcome to Build Your Library’s Homeschool Tidbits: Episode 29 – Build Your Own Timeline 101! In this weekly video series, I will delve briefly into a topic related to homeschooling and will share some of my knowledge and expertise as a long-time homeschooling mother of 4 children. Three of whom have graduated high school and one who is a new college graduate!
This is the fifth post in the Back To “Home” School blog series, now also included in our Homeschool Tidbits series. I’ve given some advice to new homeschooling mothers, getting your materials organized for a great year, and tips to help you to avoiding burnout. Today, we will talk about historical timelines!
 Timelines are essential when it comes to showing your children the grand scope of history. They help your children see connections, giving them a way to visualize when events overlap that they may have not realized when just reading about them separately. It is one thing to know that something happened in a particular year — memorizing dates is helpful for test taking, but if you want your children to have a deeper understanding of history then you really want to show them where the events fall on a timeline.
For instance, did you realize that both Anne Frank and Martin Luther King Jr. were born in 1929? We may think of them as living in distinctly different time periods, but they would have been contemporaries had Frank lived past childhood. Timelines can bring these kinds of connections to your children’s attention.
In this post, I will show you the basics, as well as give you some examples of different ways you can make a timeline work in your homeschool.
How do you create a timeline?
Example 1:
 Timelines can come in many shapes and sizes. When we first started out, I went the easy route. I bought the largest tri-fold display board from our local Staples for about $5, pulled out a yardstick and divided the workspace into sections, then drew lines and labeled dates. When we got to an event, we colored in the timeline figure, cut it out, and used a glue stick to attach it to the board. As far as a “functional” timeline goes, it fit the bill. It was also portable as it folded flat and could be stored out of the way when it wasn’t in use. Was it the prettiest? Nope. But it worked.
Example 2:
Example 3:
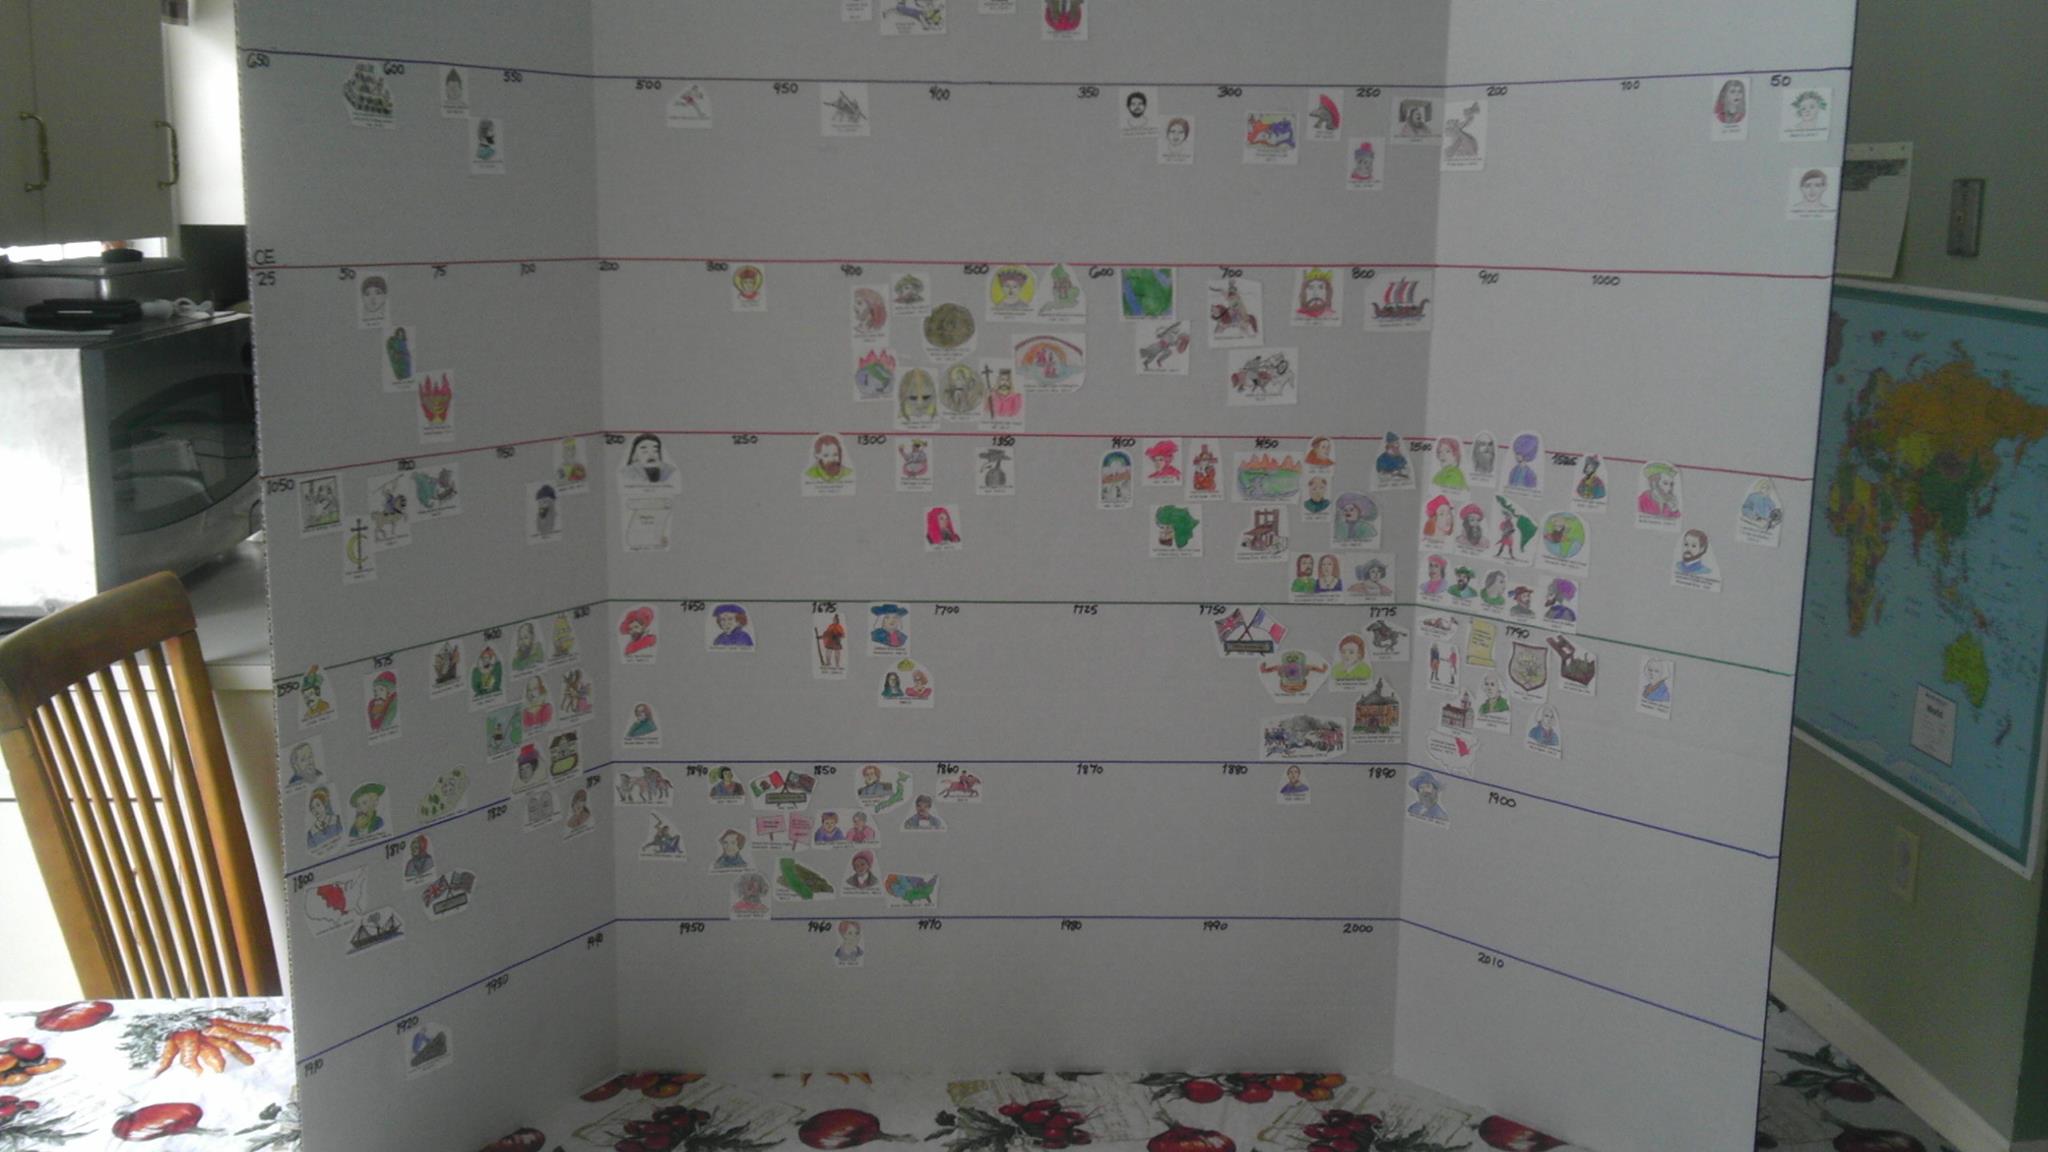
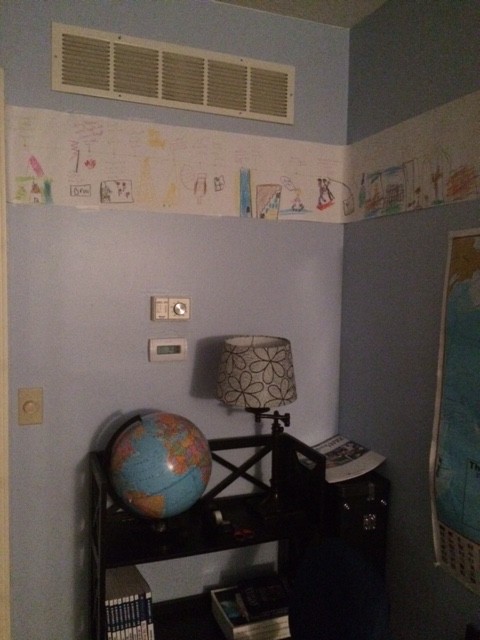
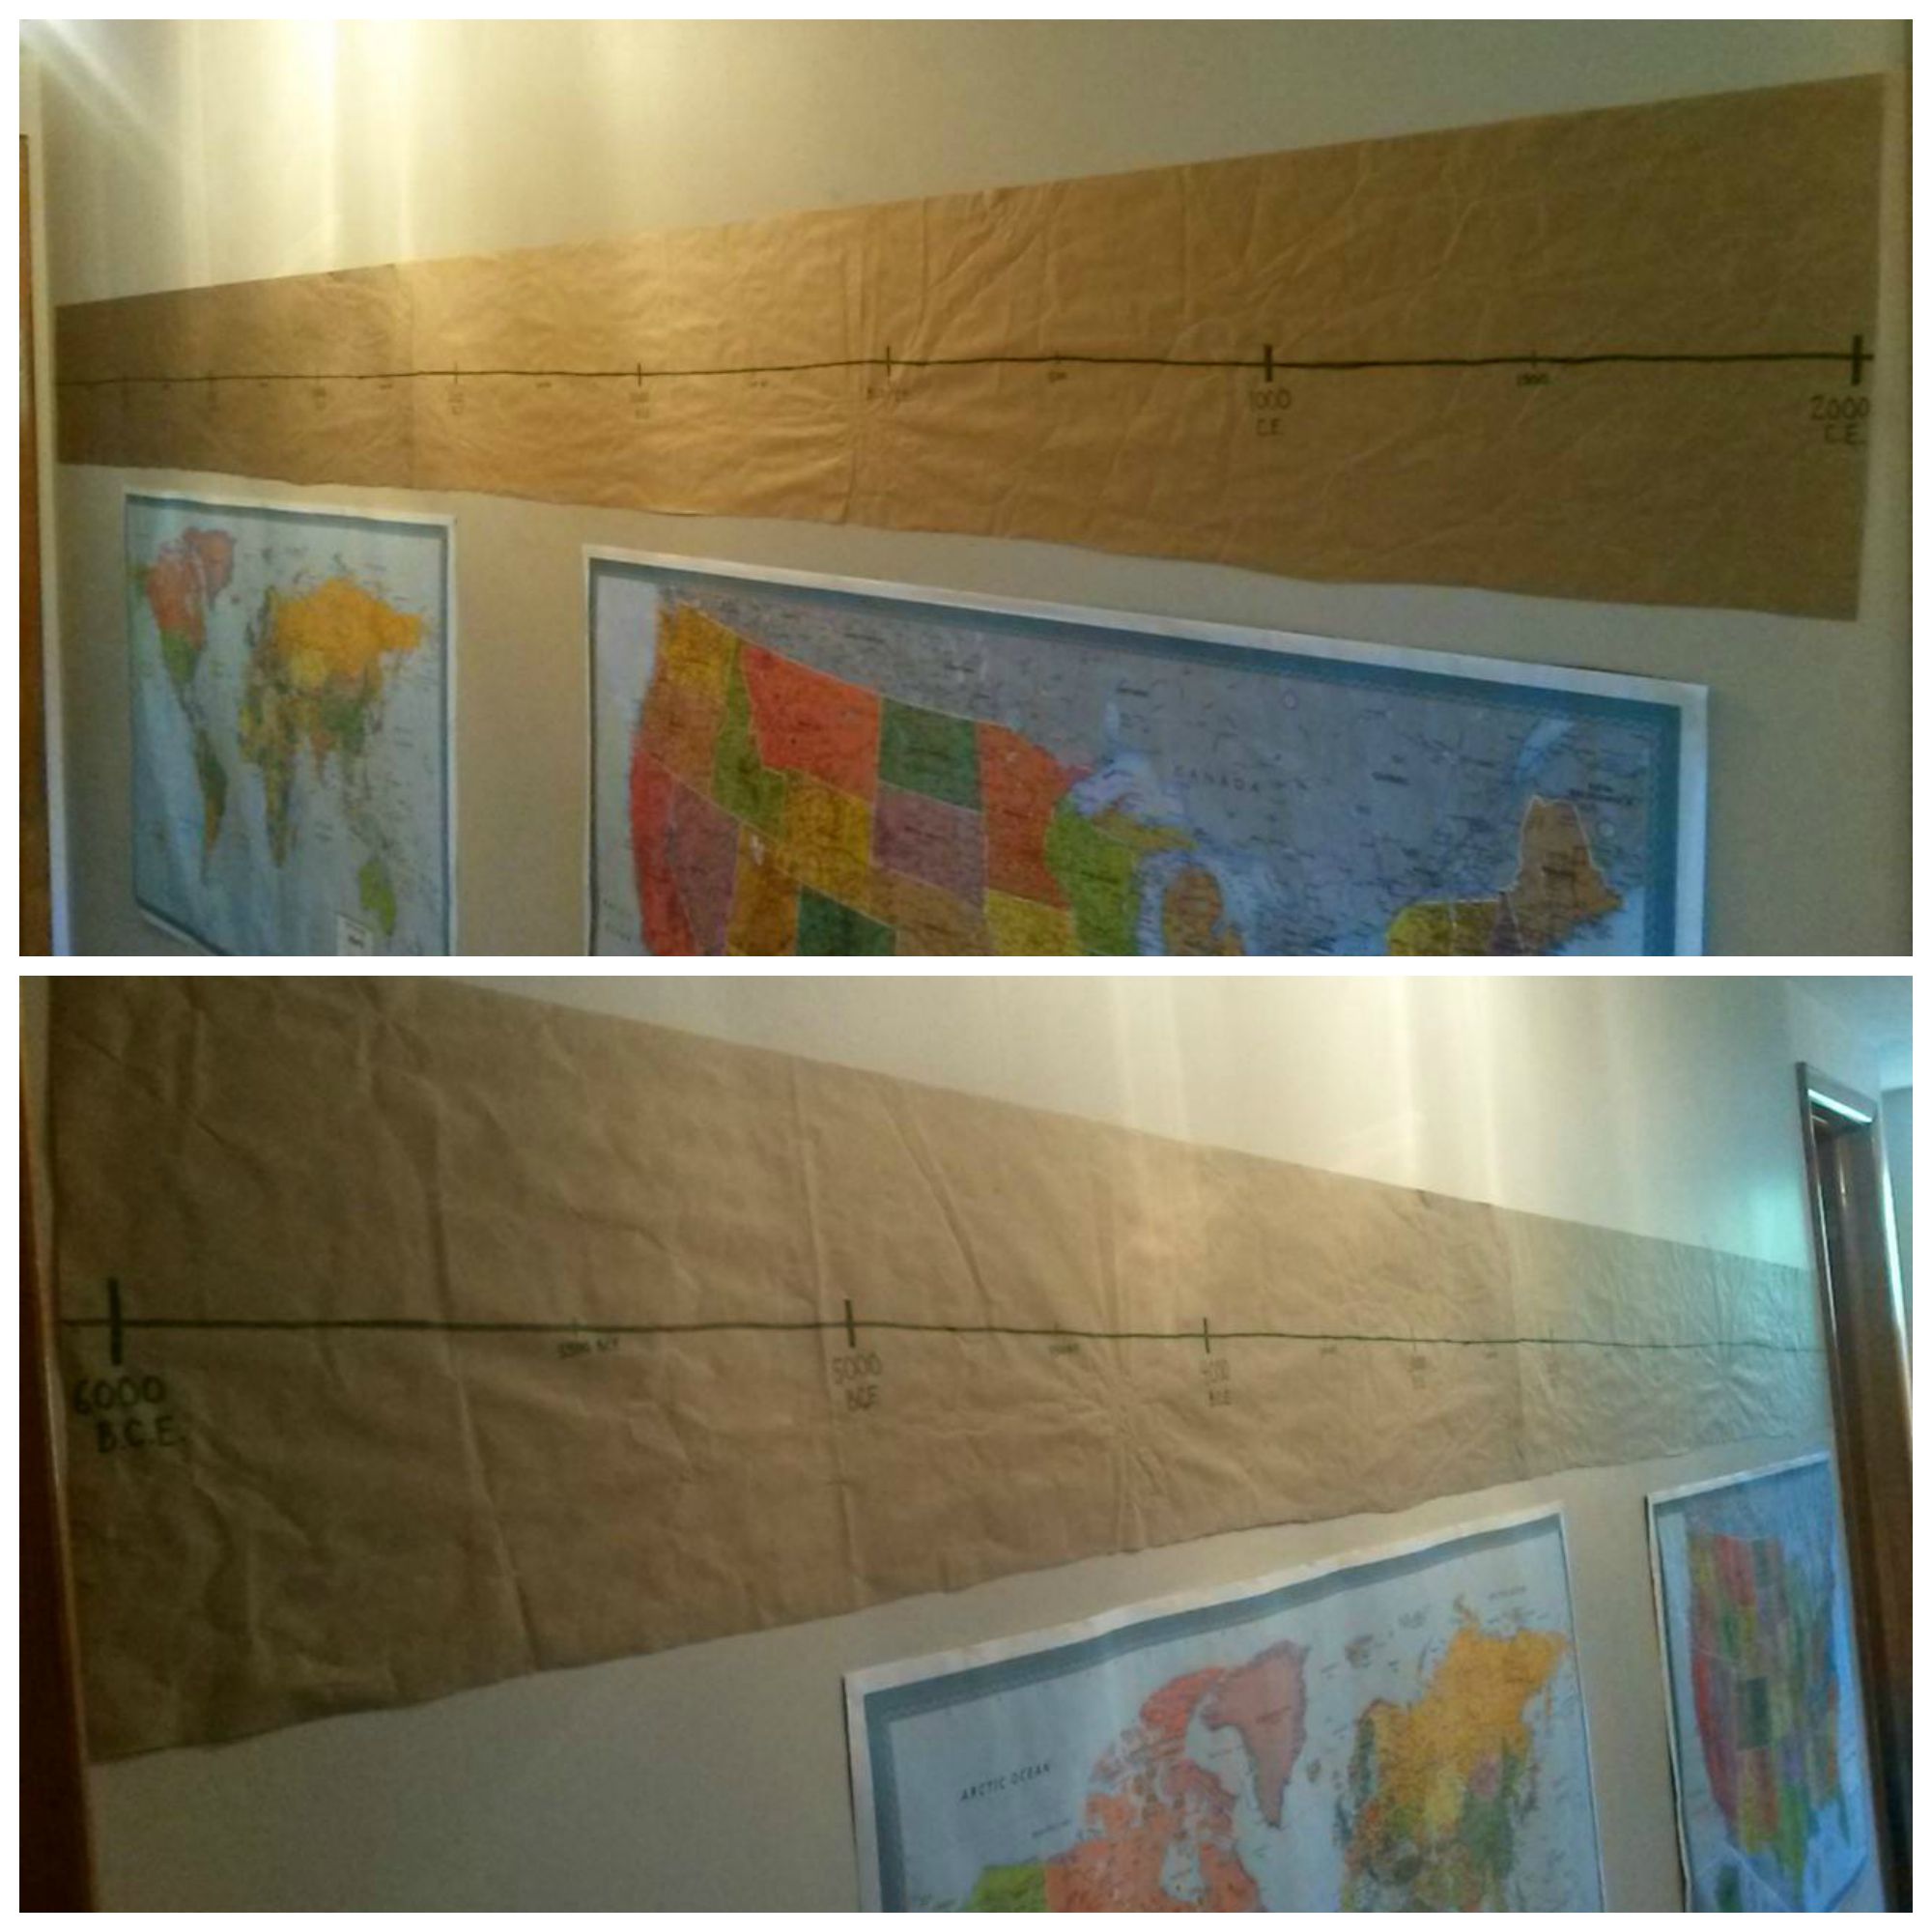
We built this timeline for my now 11-year-old a few years back. She is very visual and I wanted a timeline we could have out at all times. Because we have very limited wall space, we came up with this idea. Two side-by-side bulletin boards covered in antique-style maps for a pretty backdrop to our timeline figures.
Here’s the walkthrough to building your own:
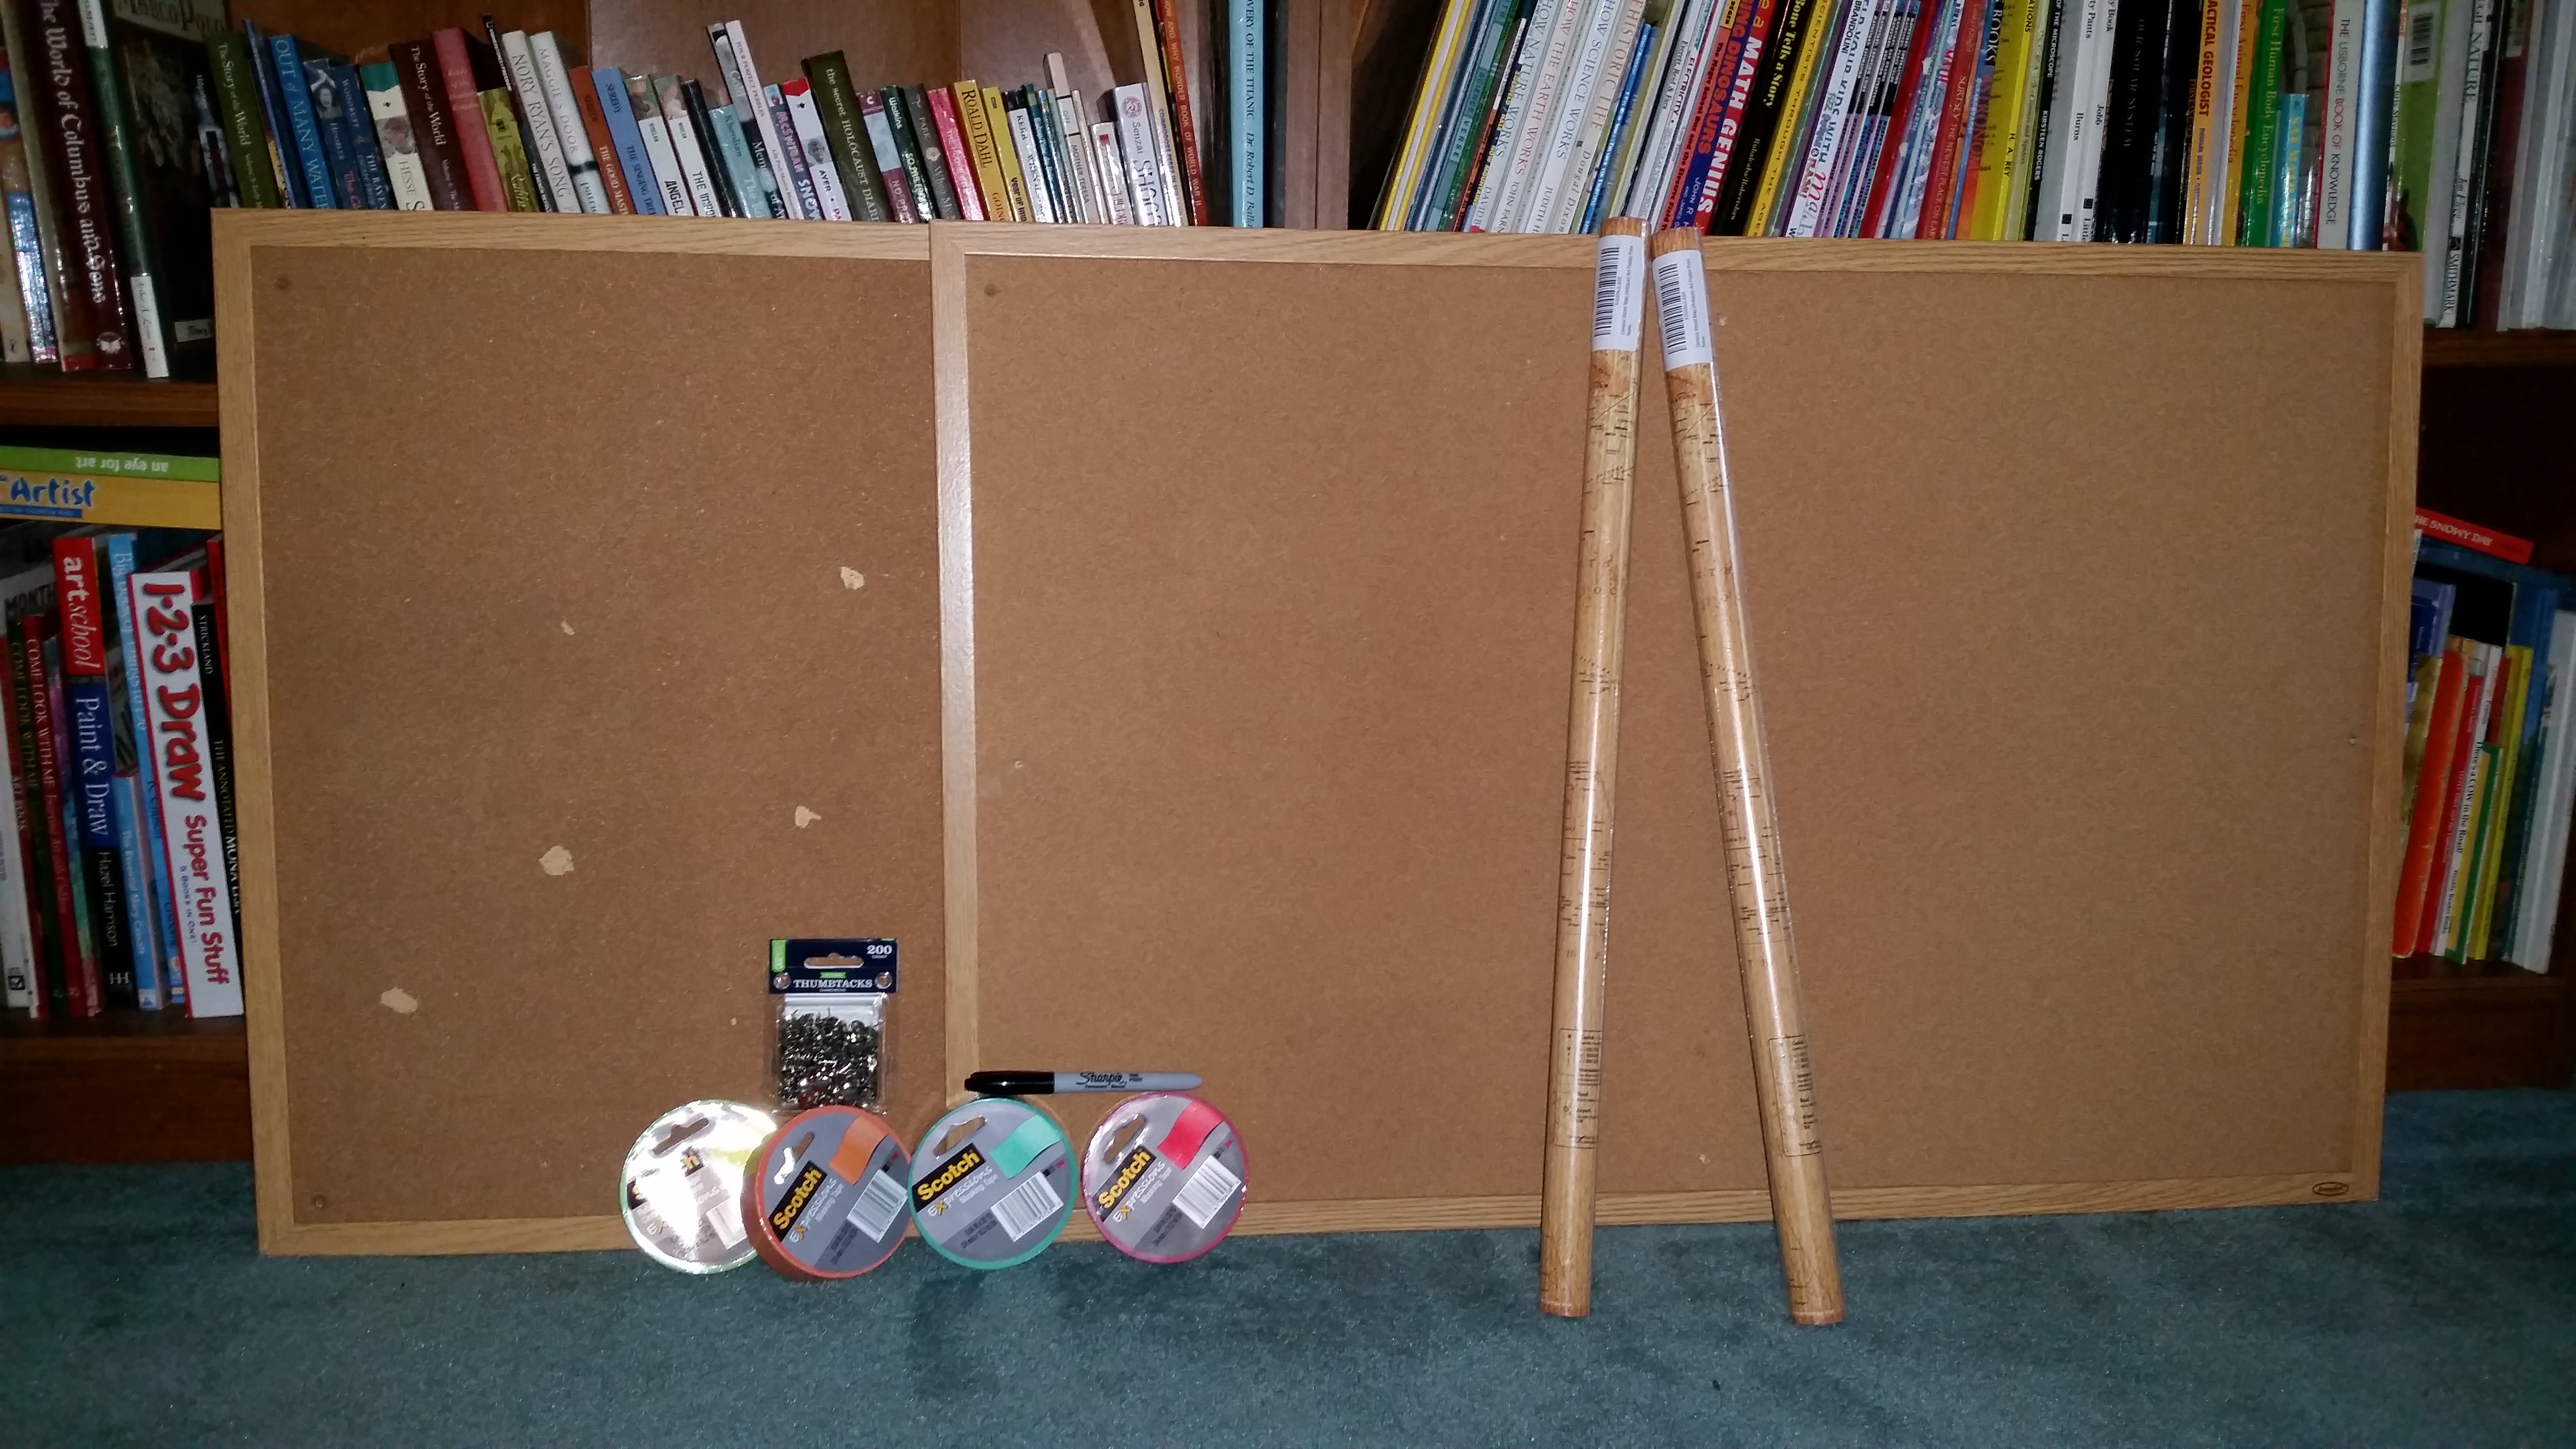 We gathered our materials – 2 “free” 23″ x 35″bulletin boards (notice they are kind of beat up), two 24″x 36″ antique style map posters ($9.55 each), 1″ colored scotch tape in 4 colors ($2.25 each), a Sharpie marker, ruler and thumbtacks. Not pictured are post-it notes, a pen, and our handy-dandy label maker.
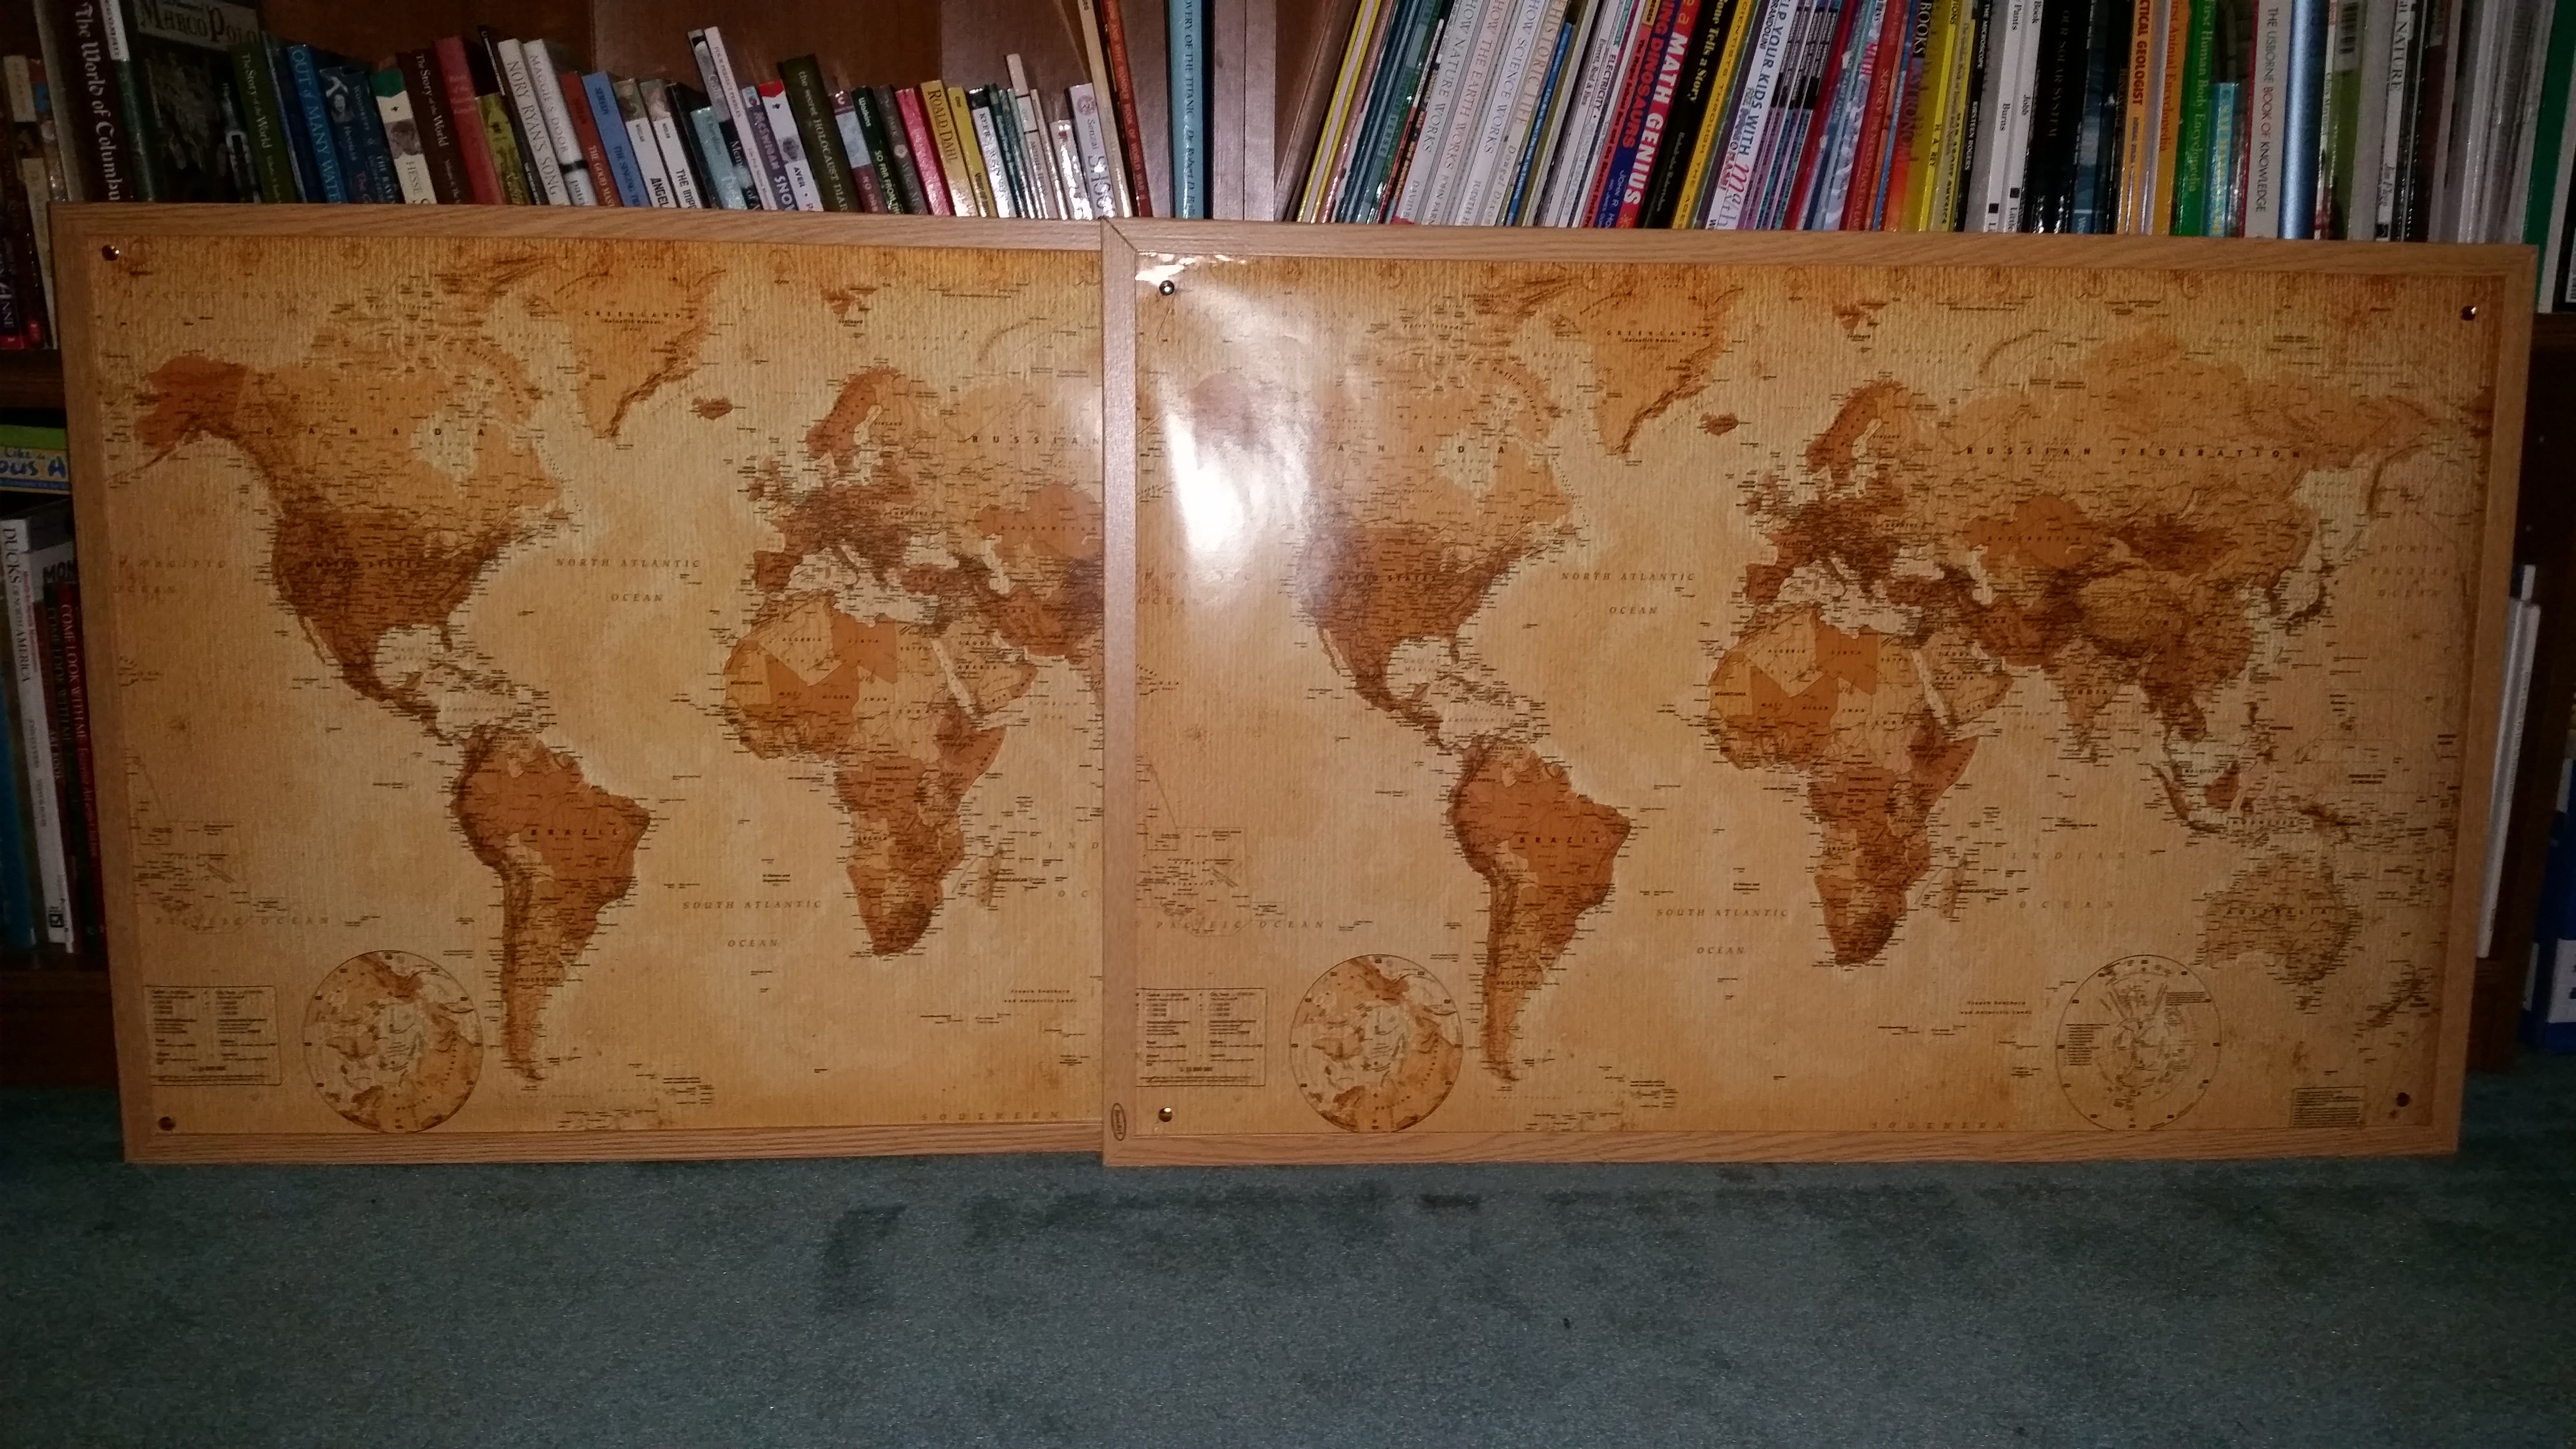 We removed the frame from the boards so the edges were way up under the molding and cut the maps to fit. Then we tacked them on with thumbtacks. When we replaced the frame, we made sure the posters were smooth and tight inside the frame. Now we were ready to measure out the spacing to add the tape lines to mark the time periods.
When you create a timeline, you want to differentiate the major time periods. For an  elementary student, you can simplify it into four categories – Ancients, Middle Ages – Renaissance, Early Modern, and Modern. I like to color-code these categories. It really doesn’t matter what colors you use, as long as they are different. Once you have your categories, you can start to place your dates. I used colorful scotch tape for our categories. They just happened to have 5 different colors of masking tape at Walmart, so we picked 4 of them. We measured to make sure the periods would be evenly spaced — it will depend on how large of a surface you are working with. We ended up with about 4 inches between each category.
Once you have your colored categories, you can start adding your dates. This is the part that caused me the most stress. When you are creating a historical timeline, it can be difficult to figure out when to begin, how much space between dates, and how many dates. I like to keep things fairly simple – I look at what the earliest event we’ll be covering in history will be, and that’s our starting place. So for our timeline we started at 5000 BCE. Then the distance between dates will change depending on how many events you expect to add. These are the dates I used on our timeline:
Ancients | Middle Ages - Ren  | Early Modern  |  Modern

B.C.E.         C.E.              1600             1860
5000           25                1625             1870
4000           75                1650             1880
3000           100               1675             1890
2500           200               1700             1900
2000           300               1725             1910
1500           400               1750             1920
1250           500               1775             1930
1000           600               1790             1940
900            700               1800             1950
800            800               1810             1960
700            900               1820             1970
650            1000              1830             1980
600            1050              1840             1990
550            1100              1850             2000
500            1150                               2010
450            1200                               2020
400            1250
350            1300
300            1350
250            1400
200            1450
150            1500
50             1525
.              1550
.              1575
 I started adding temporary date markers with post-it notes so that it would be easy to adjust them as needed to be sure they all fit. You could add more dates if you have a larger space to work with, but I find these dates sufficient for the elementary-aged child, and they fit nicely on a tri-fold display board or my two bulletin boards. Once I arranged the spacing to my liking (about an inch or 2 depending on how many dates I was trying to fit), I created the permanent date stickers with my label maker. You could just as easily write them on the tape with a Sharpie, but on this project, we were aiming for pretty. Since this timeline is hung up in our kitchen where we spend a lot of our time, we wanted to make it look as nice as possible. My handwriting is not the greatest, so we broke out the label maker. 😉
This is our finished product (along with my then 6-year-old who is the main student using the wall timeline):
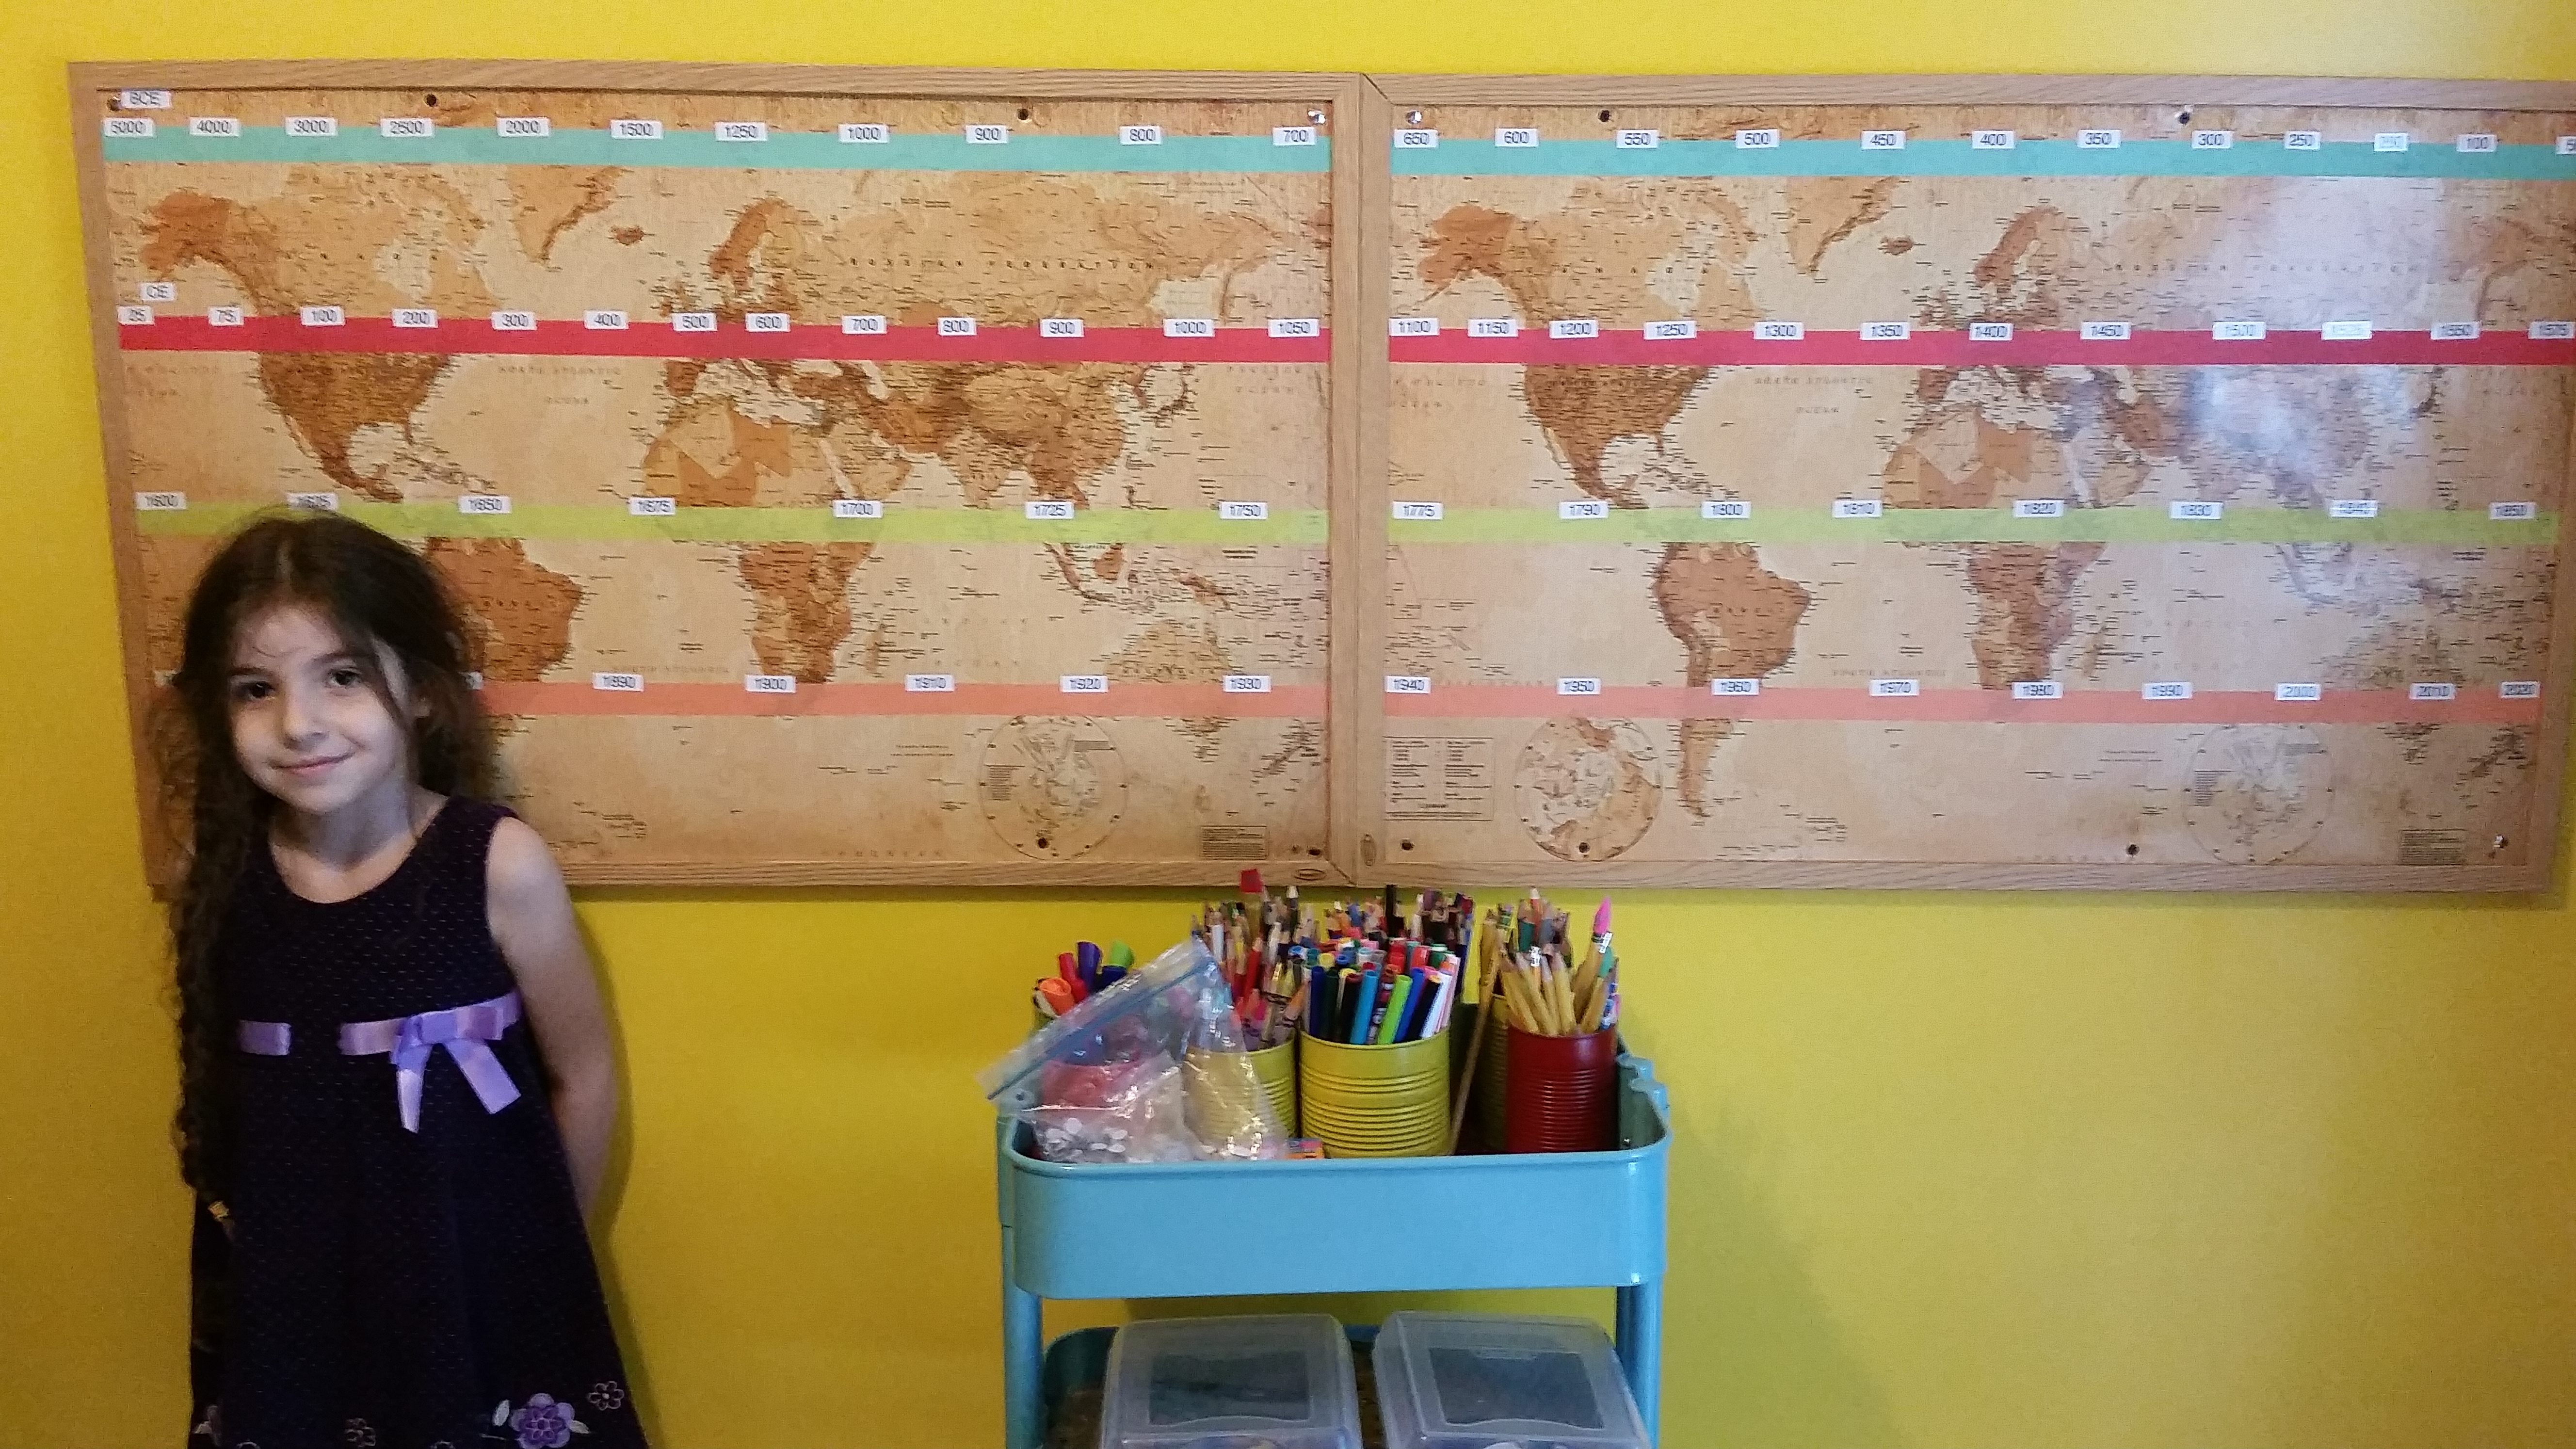 The maps are purely decorative and will eventually get covered up by timeline event figures, but doesn’t it look nice? 🙂
Previous Bonus Timeline Video on YouTube:
This is just one way of making use of a timeline. I understand that not everyone has wall space for something like this, or the patience to put it together. For some more excellent ideas, I asked some Build Your Library customers to send me pictures of their working timelines so that I could share some of their creativity with everyone for some further inspiration.
Example 4:
This timeline was created by Annie. She says:
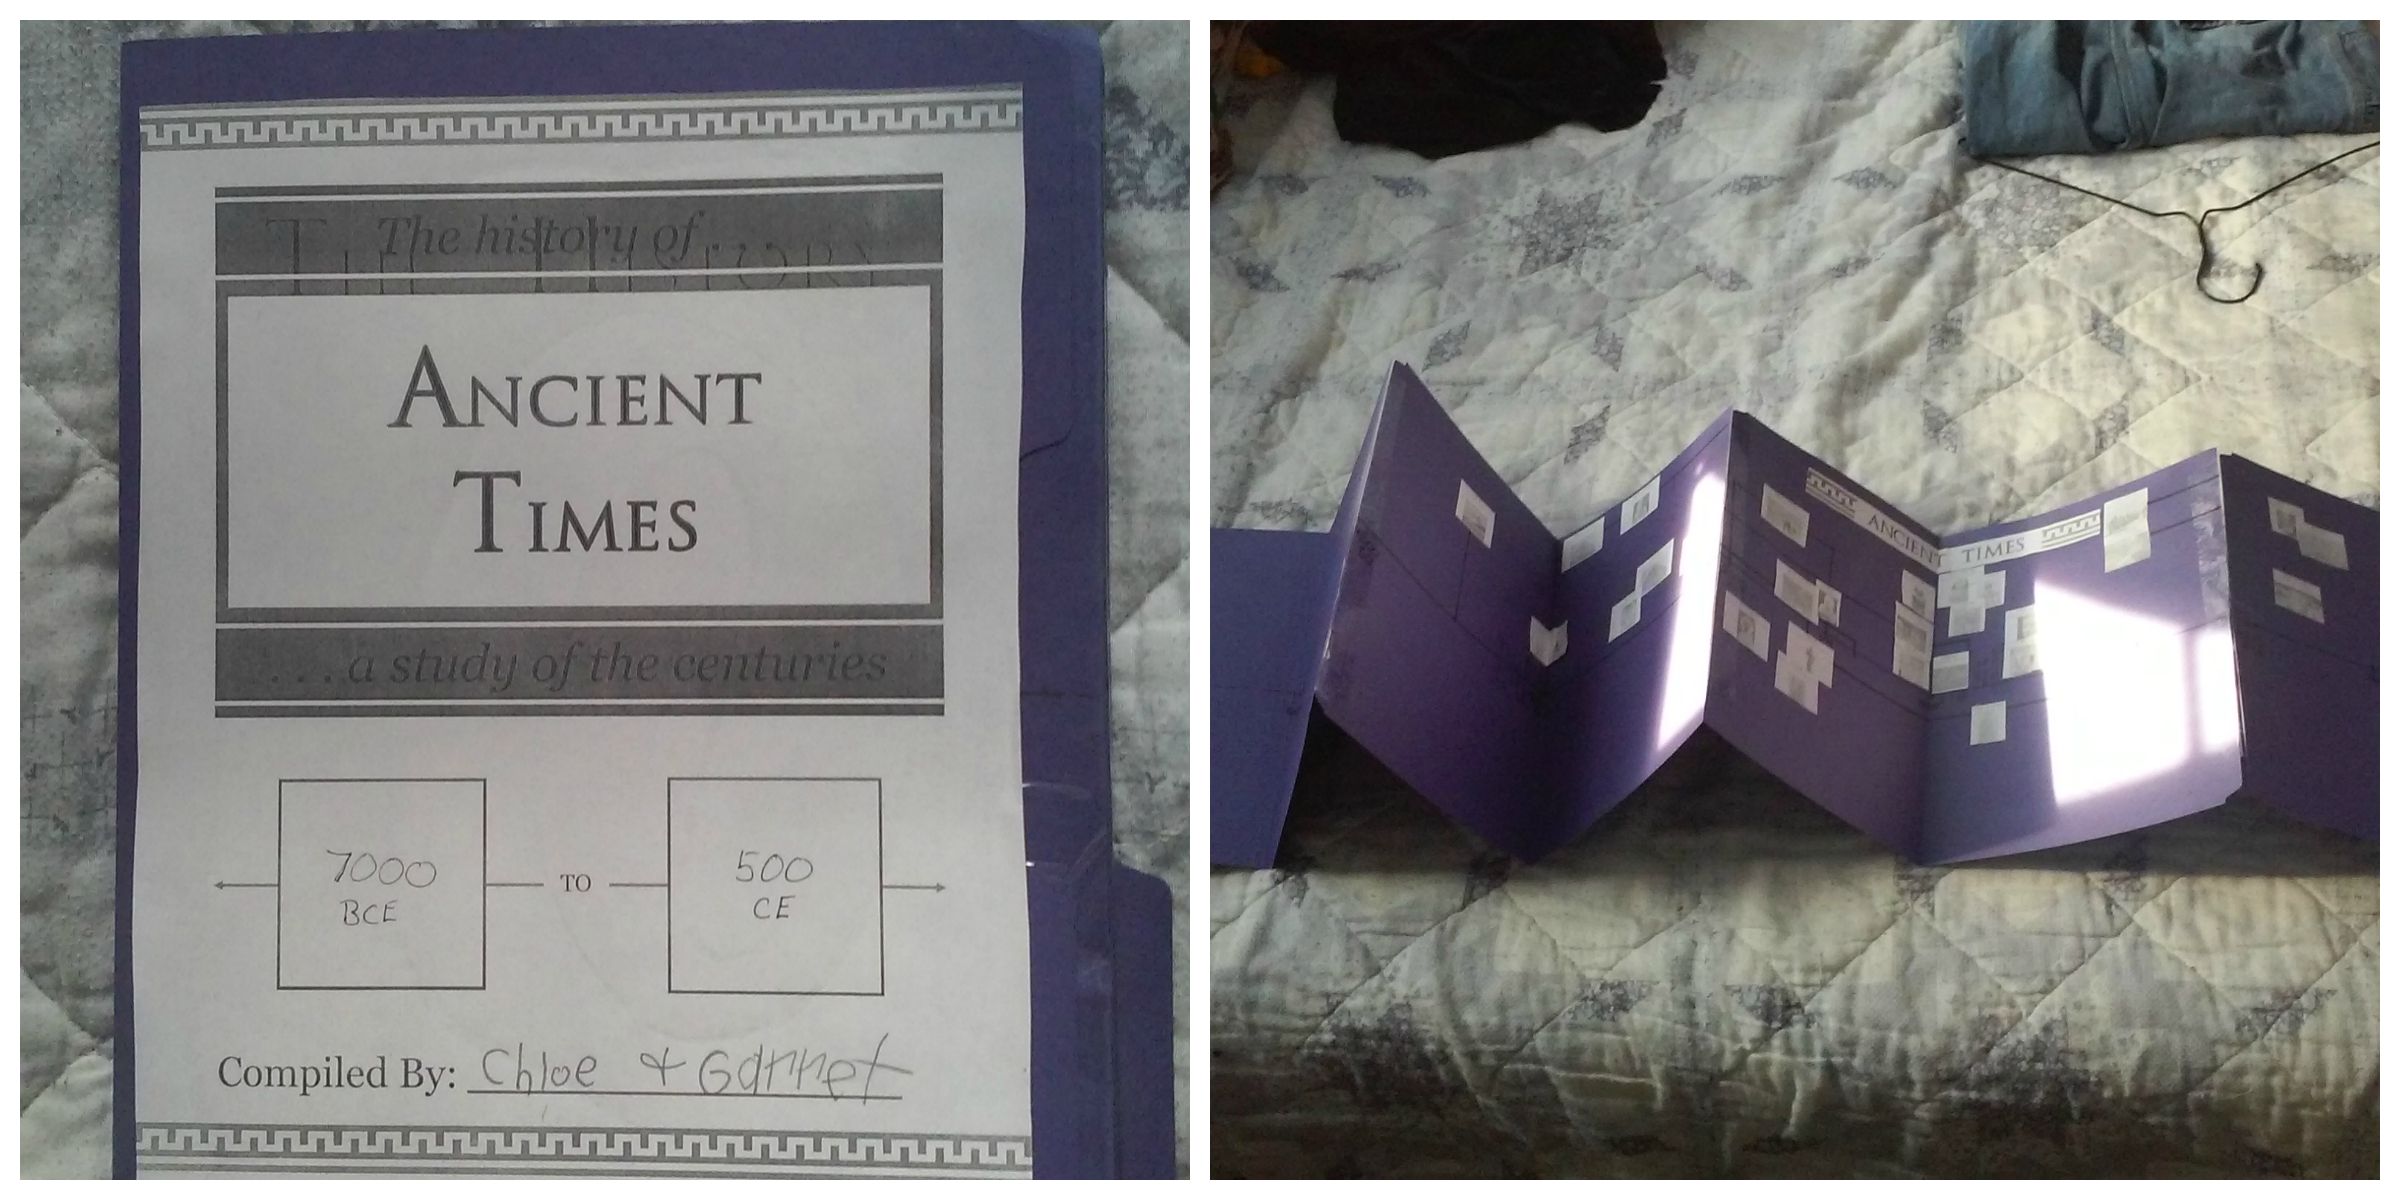 “The cover and banner are from notebookingpages.com and the images were free printables from http://tendingourlordsgarden.blogspot.com/2012/05/story-of-world-timeline-cards.html, but I don’t have a color printer. I just trimmed and taped together file folders, and guessed at most of it. It will be on a wall once we move, but for now, it is folded on a bookshelf when not in use.”
Example 5:
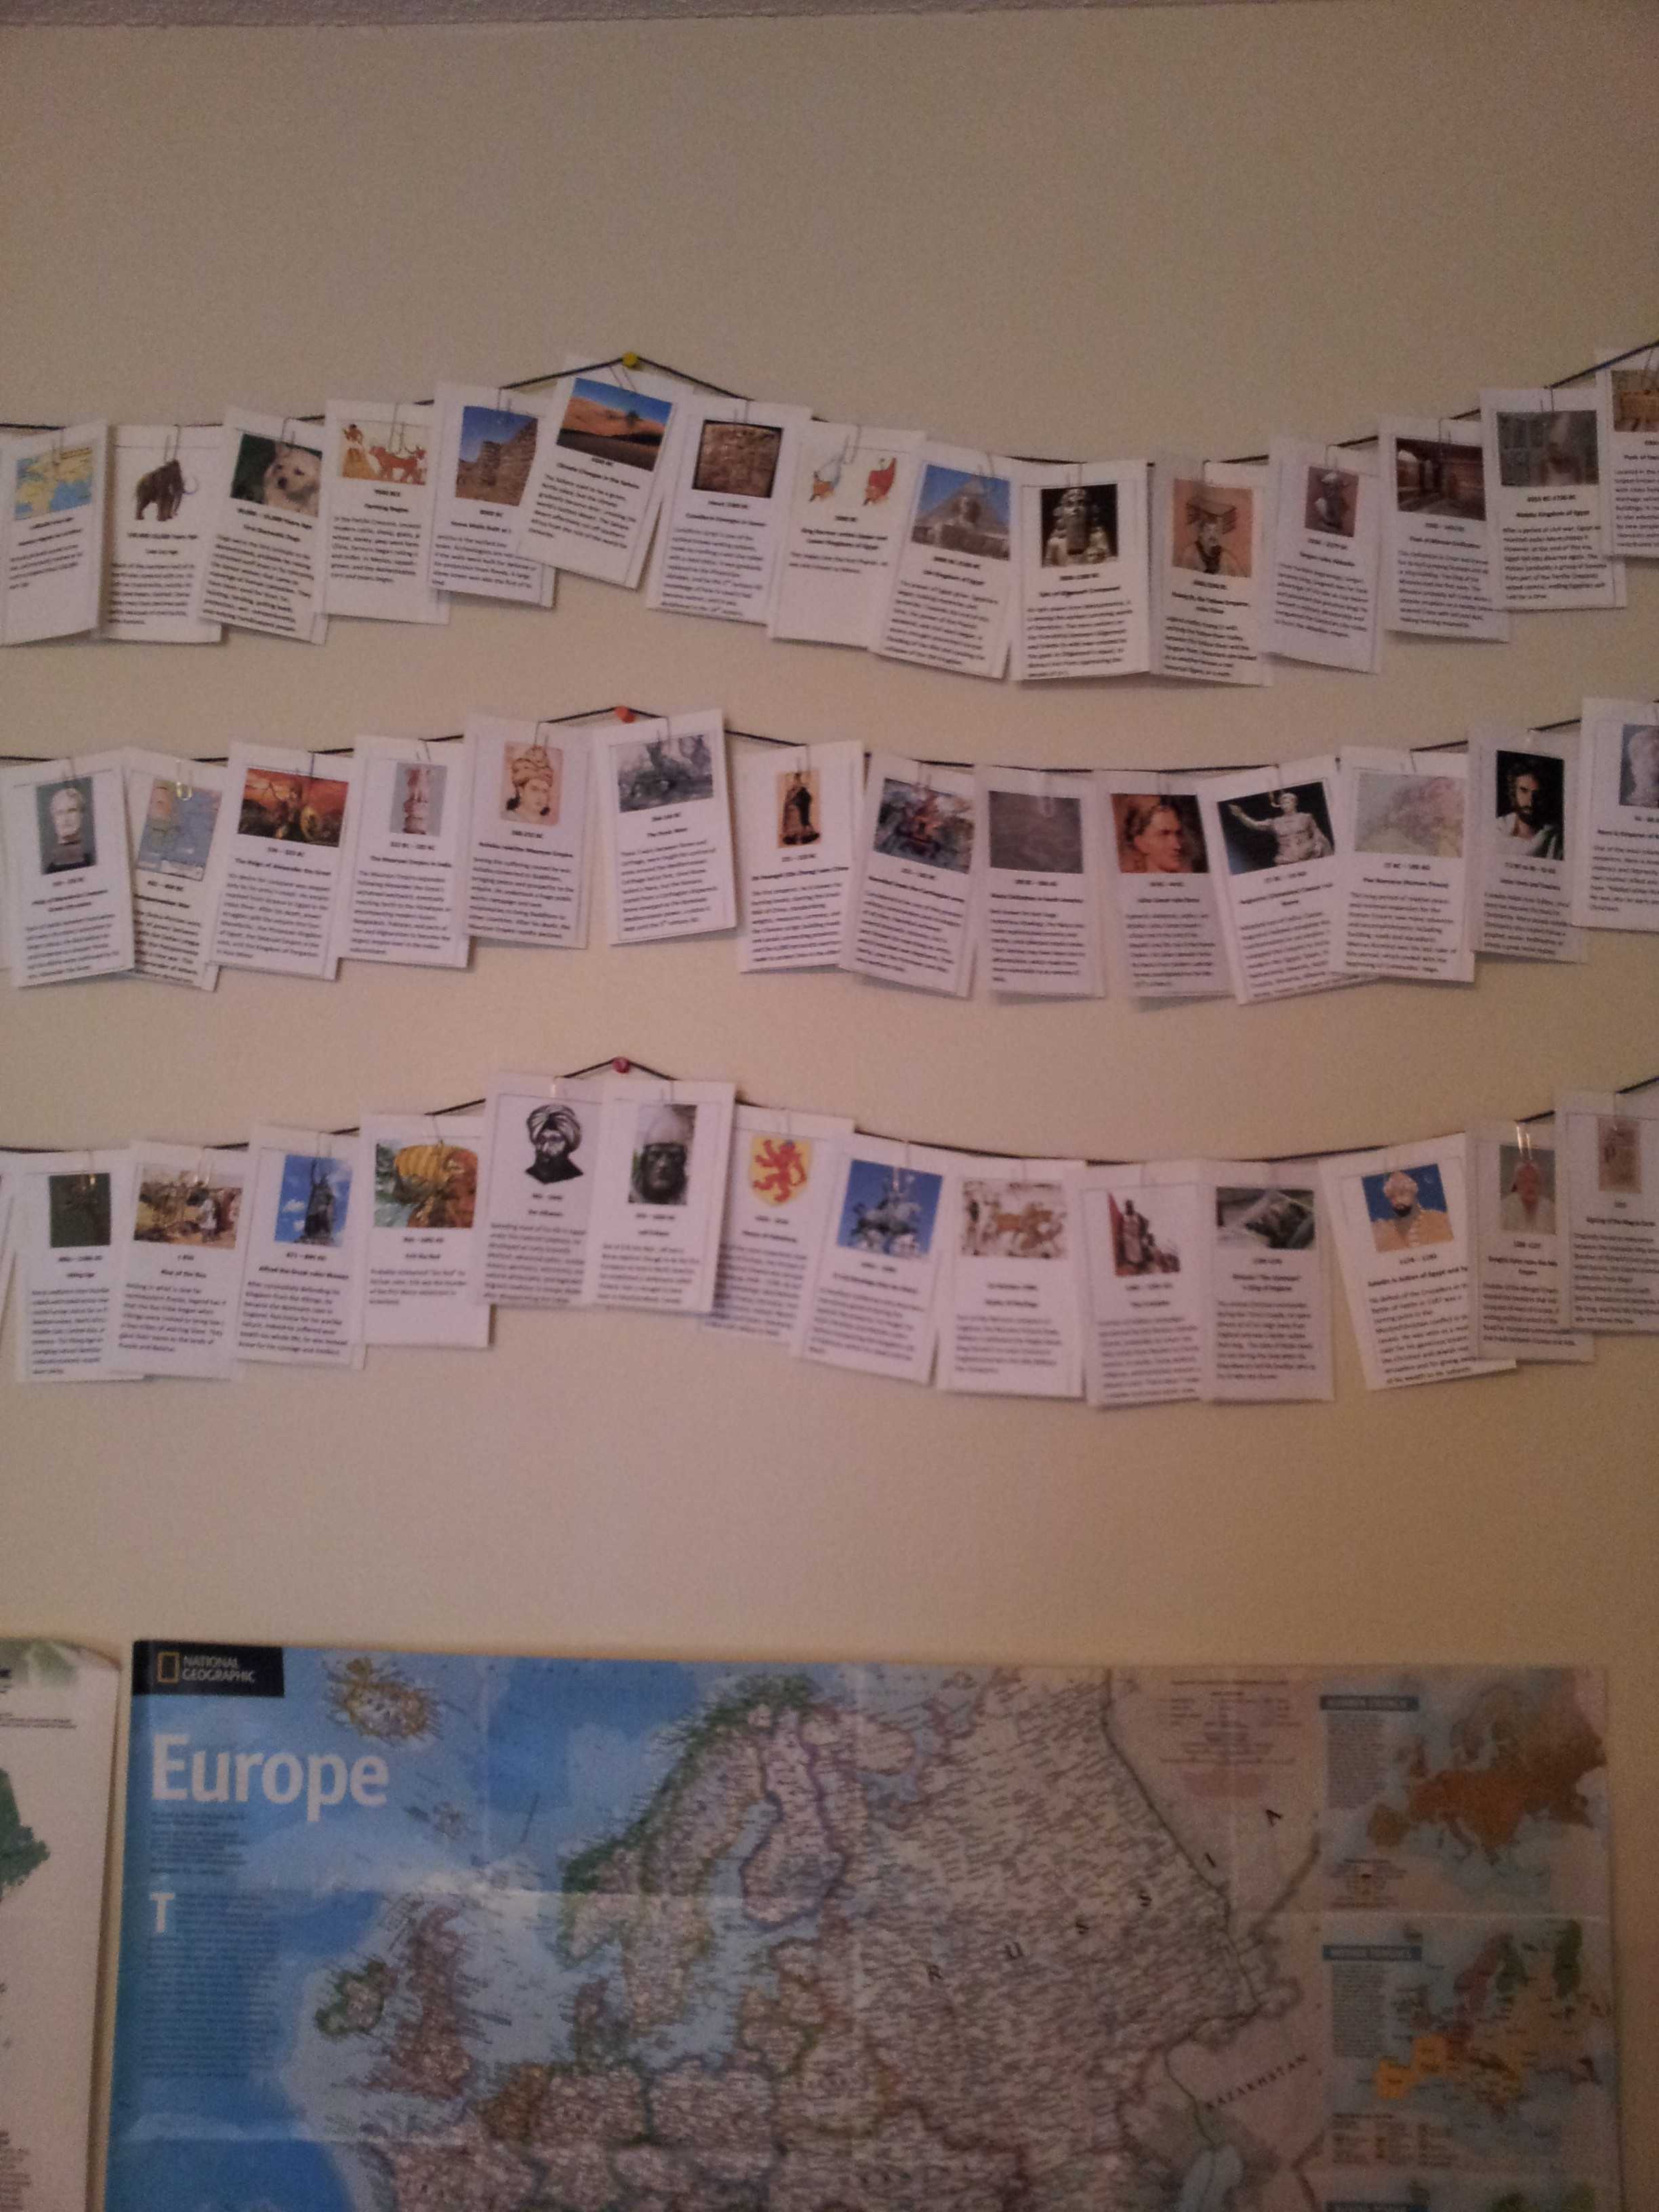 This timeline was submitted by Diana. She says:
“We used index cards paper-clipped to yarn on our dining room wall. It makes it easy to add additional cards later and gives us a room for a little review info (especially helpful for my husband and I!). It has led to lots of good dinner conversations and games. Our favorite is trying to guess which timeline card someone is describing.”
Example 6:
 This is how Amy set up her timeline. She says:
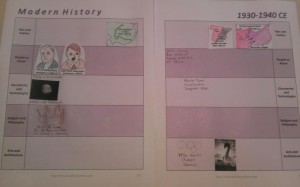
Here’s a photo of a timeline my daughter, Ava (age 8), and I have been working on. As I read from Story of the World, she draws a picture. She then narrates a short sentence or phrase to caption the picture. We did a timeline for Book 1 about 18 months ago then put it away (attached). This week, we took it back out to review before starting Book 2. Although I wasn’t sure what some of the pictures were about, she was able to tell me exactly what they were and how they each tied in with the event! This is a favorite part of our week for me.
Example 7:
Finally, here’s Claire’s wall timeline. She says: “We will be starting this week so there are no figures on it yet. I wanted to have the whole thing fully visible so I used an 11 foot long piece of paper and hung it in our hallway.”
Thanks, Annie, Diana, Amy, and Claire!
So as you can see – timelines can be as simple or elaborate as you want them to be. I hope that I’ve taken some of the fear and confusion out of the process.
Do you have any creative Timelines you want to share? Send us a message or leave us a comment and we can add your creation to the list above. Thanks!
Coming up next…
I hope you found this Tidbit helpful! Come back next week for more homeschooling inspiration!
Until then, happy reading!
Related Articles: Back to “Home” School Series (B2HS)
- (1) Homeschool Tidbit: Advice to the New Homeschooling Mother (B2HS)
- (2) Homeschool Tidbit: Getting Organized for the New School Year (B2HS)
- (3) Homeschool Tidbit: Tips for a Great First Day (B2HS)
- (4) Homeschool Tidbit: Tips for Avoiding Homeschooling Burn Out (B2HS)
- (5) Homeschool Tidbit: Build Your Own Timeline 101 (B2HS)
See Other Related Articles:
- Happy, Hygge Homeschooling?
- “Are worms made out of metal?” And other great rabbit trails.
- Charlotte Mason in the Secular Homeschool
- A Literary Education book
- About Build Your Library
- Homeschool Tidbits: Build Your Library’s Weekly Video Blog Series
.
 Emily Cook is the author and creator of the secular homeschool curriculum Build Your Library, a literature-based K-12 program infused with the teachings of Charlotte Mason. She writes full-year lesson plans as well as shorter topical unit studies. Emily has been homeschooling her four children in Southern NH for 21 years. She is passionate about reading aloud to children of all ages and loves to share her love of literature with others. She and her family also make incredibly dorky videos about homeschooling, books, and more on Youtube at ARRRGH! Schooling. You can follow her on Facebook, Twitter, and Pinterest. You can also check out her author page on Amazon.